How to Make Colored Recent Post Widget Blogger
This widget supports responsive which will follow the screen size used.

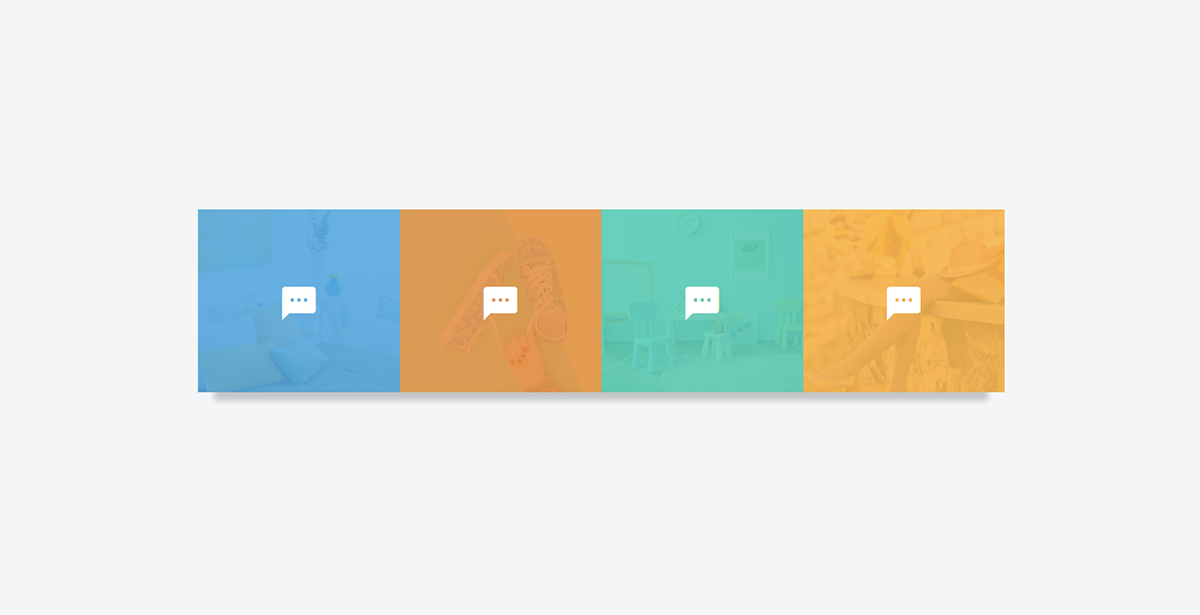
For live view of this widget can visit my friend pen below:
How, interested to install it on the blog? For my friend who want to
install it, I will give the tutorial below
Include material icon before </head> like this:
below before the code ]]> </b:skin> or </ style>
See the results on your blog.
Easy enough is not it? Such is the tutorial for this opportunity, thank you for visiting.
For live view of this widget can visit my friend pen below:
How, interested to install it on the blog? For my friend who want to
install it, I will give the tutorial below
How to Make Recent Post Widget Color
Go to Blogger > Themes > Click the Edit HTML buttonInclude material icon before </head> like this:
<link href='https://fonts.googleapis.com/icon?family=Material+Icons' rel='stylesheet' type='text/css'/>Then add the CSS code
below before the code ]]> </b:skin> or </ style>
.gravityfeatured{display:flex;margin:0 auto 20px auto;width:100%;overflow:hidden;max-width:970px}
.gravfeatureditem{background:rgba(0,0,0,0.02);display:block;position:relative;float:left;overflow:hidden;height:220px;width:25%}
.gravfeatureditem .gracontent{background:#3498db;display:block;position:absolute;z-index:6;bottom:0;left:0;right:0;transform:translate(0,0);opacity:1;visibility:visible;transition:all .3s}
.gravfeatureditem:hover .gracontent{opacity:0;visibility:hidden;transform:translate(0,60px)}
.gravfeatureditem .gracontent h3{font-size:14px;color:#fff;padding:15px;margin:0;text-align:center;overflow:hidden;white-space:nowrap;text-overflow:ellipsis}
.gravfeatureditem .feat-img{width:100%;height:100%;background-size:cover;background-position:50%}
.gravfeatureditem a{display:block;color:rgba(255,255,255,1);position:relative;vertical-align:bottom;z-index:5;height:100%;transition:all .3s}
.gravfeatureditem a:before{content:'';background:#3498db;width:100%;height:100%;position:absolute;z-index:3;top:0;opacity:0;transition:background 0.3s linear,opacity 0.3s linear}
.gravfeatureditem.first a:before,.gravfeatureditem.first .gracontent{background:#56a8df}
.gravfeatureditem.second a:before,.gravfeatureditem.second .gracontent{background:#e49148}
.gravfeatureditem.third a:before,.gravfeatureditem.third .gracontent{background:#5bccb6}
.gravfeatureditem.fourth a:before,.gravfeatureditem.fourth .gracontent{background:#f5b44c}
.gravfeatureditem a:hover:before{opacity:0.9;}
.gravfeatureditem a:after{content:'textsms';font-family:Material Icons;position:absolute;z-index:3;font-size:3rem;top:32%;left:0;right:0;bottom:0;color:#fff;text-align:center;transform:translate(0,-60px);animation:jellygrav .6s linear;opacity:0;visibility:hidden;transition:all .3s}
.gravfeatureditem:hover a:after{opacity:1;visibility:visible;transform:translate(0,0)}
@media screen and (max-width:826px){
.gravfeatureditem{width:50%}
.gravfeatureditem.third,.gravfeatureditem.fourth{display:none}}
@media screen and (max-width:641px){
.gravfeatureditem{width:100%}
.gravfeatureditem.second,.gravfeatureditem.third,.gravfeatureditem.fourth{display:none}}
NOTE: Widget uses CSS library icon from Material Icons, if my friend uses Fontawesome. Replace the CSS code below.
.gravfeatureditem a:after{content:'textsms';font-family:Material Icons;position:absolute;z-index:3;font-size:3rem;top:32%;left:0;right:0;bottom:0;color:#fff;text-align:center;transform:translate(0,0);animation:jellygrav .6s linear;opacity:1;visibility:visible;transition:all .3s}The next step, add the code below just before the code </body> <script type='text/javascript'>
//<![CDATA[
// Recent Post
function getPostUrl(a){for(var b=0;b<a.link.length;b++)if("alternate"==a.link[b].rel){var c=a.link[b].href;return c}}function getPostPublishDate(a){var b=a.published.$t,c=b.split("-")[2].substring(0,2),d=b.split("-")[1],e=b.split("-")[0],f=["January","February","March","April","May","June","July","August","September","Octobor","November","December"],g=f[d-1],h=g+" "+c+", "+e;return b?h:""}function getPostCategory(a){var b=a.category;b&&(b=a.category[0].term);var c='<div class="category-wrapper"><a class="category" href="/search/label/'+b+'?max-results=10">'+b+"</a></div>";return b?c:""}function Slider(a){for(var c=(new Array,""),d=a.feed.entry.length,e=0;e<d;e++){var f=a.feed.entry[e],g=f.title.$t,h=getPostUrl(f),l=(f.author[0].name.$t,getPostPublishDate(f),getPostCategory(f),f.category[0].term),m=a.feed.entry[e].content.$t,n=$("<div>").html(m);if(m.indexOf("//www.youtube.com/embed/")>-1)var o=a.feed.entry[e].media$thumbnail.url,p=o;else if(m.indexOf("<img")>-1)var q=n.find("img:first").attr("src"),p=q;else var p=no_image;0==e&&(c=c+'<div class="gravfeatureditem first"><div class="gracontent"><h3>'+g+'</h3></div><a href="'+h+'"><div class="feat-img" style="background-image:url('+p+');"></div></a></div>'),1==e&&(c=c+'<div class="gravfeatureditem second"><div class="gracontent"><h3>'+g+'</h3></div><a href="'+h+'"><div class="feat-img" style="background-image:url('+p+');"></div></a></div>'),2==e&&(c=c+'<div class="gravfeatureditem third"><div class="gracontent"><h3>'+g+'</h3></div><a href="'+h+'"><div class="feat-img" style="background-image:url('+p+');"></div></a></div>'),3==e&&(c=c+'<div class="gravfeatureditem fourth"><div class="gracontent"><h3>'+g+'</h3></div><a href="'+h+'"><div class="feat-img" style="background-image:url('+p+');"></div></a></div>')}slider.html('<div class="gravityfeatured">'+c+"</div>"),$(".gravityfeatured").find(".feat-img").each(function(){$(this).attr("style",function(a,b){return b.replace("/default.jpg","/mqdefault.jpg")}).attr("style",function(a,b){return b.replace("s72-c","s1600")}).attr("style",function(a,b){return b.replace("s320","s1600")}).attr("style",function(a,b){return b.replace("s400","s1600")}).attr("style",function(a,b){return b.replace("s640","s1600")})})}var slider=$("#gravityfeatured .widget-content"),sliderContent=slider.text().trim();"no"!==sliderContent.toLowerCase().trim()&&'"no"'!==sliderContent.toLowerCase()&&""!==sliderContent?"[recent]"!==sliderContent?$.ajax({url:"/feeds/posts/default/-/"+sliderContent+"?alt=json-in-script&max-results=4",type:"get",dataType:"jsonp",success:function(a){Slider(a)}}):$.ajax({url:"/feeds/posts/default?alt=json-in-script&max-results=4",type:"get",dataType:"jsonp",success:function(a){Slider(a)}}):$("#slider").remove();
//]]>
</script>After that next step, add the HTML widget below freely between <body> and </ body> code<b:section class='gravityfeaturedz' id='gravityfeatured' showaddelement='yes'>
<b:widget id='HTML94' locked='false' title='' type='HTML' version='1'>
<b:includable id='main'>
<div class='widget-content'>
<data:content/>
</div>
<div class='clear'/>
</b:includable>
</b:widget>
</b:section>Save template> Click Layout> Refresh Blogger page (click OK)> Add d code below within the widget you added> Click Save Widget [recent] See the results on your blog.
Easy enough is not it? Such is the tutorial for this opportunity, thank you for visiting.


Comments
Post a Comment
Bila Ada posting yang kurang, atau error atau yang lainnya, silahkan tinggalkan komentar agar artikel/post di perbaiki.
Jangan Lupa Cek Box "Notify Me" agar tahu komentar kamu dibalas oleh saya.
If there are any posts that are missing, or error or anything else, please leave a comment for the article / post to be fixed.
Do not Forget Check Box "Notify Me" to know our comments replied by me.