Posts

Showing posts with the label JS

Random Posts Widget Blogger

Image
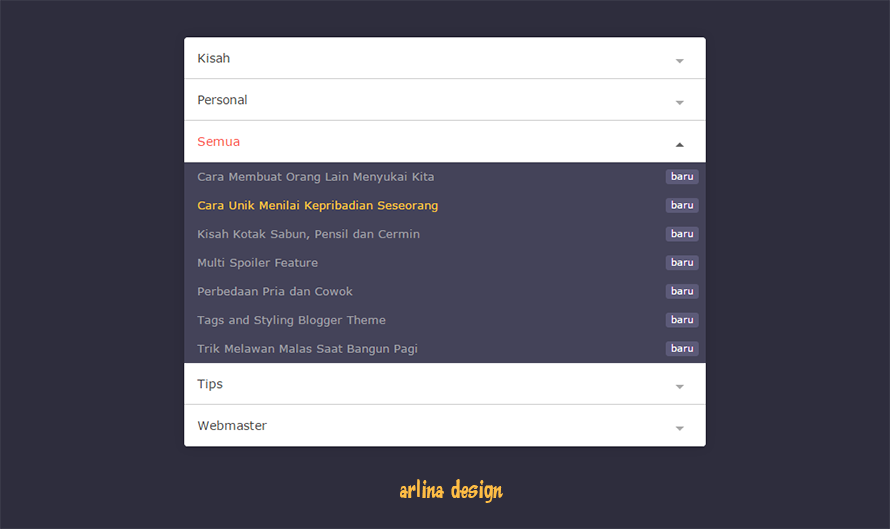
How to create random posts widget blogger (simple and stylish). 1. Login to dashboard blogger -> navigate to layout tab -> create widget html/javascript -> insert this code to the widget. <style scoped='' type="text/css"> #arlina-random ul{list-style:none;margin:0;padding:0}#arlina-random li{display:block;clear:both;overflow:hidden;list-style:none;border-bottom:1px solid #e3e3e3;word-break:break-word;padding:10px 0;margin:0;} #arlina-random li:last-child{border-bottom:0;} #arlina-random li a{color:#444;}#arlina-random li a:hover{color:#444;text-decoration:underline} </style> <div id='arlina-random'>Memuat...</div> <script> //<![CDATA[ // Random Post Widget var homePage = ' https://www.web-development.cf ',     maxResults = 10 ,     containerId = 'arlina-random'; function getRandomInt(min, max) {     return Math.floor(Math.random() * (max - min + 1)) + min; } function shuffleArray(arr) {     var i = a

Powerful Ways to Remove Active Links in Blog Comments

Image
Link is active in the comment, what does it mean? An active link is a link that contains hyperlinks to point to a specific page or site.Means if combined, the meaning of the active link in the comment is the active link in the comment. Usually embedded by other blogger people or admins in the comments column as a response to the article in a blog post. If there is an active link, is there any inactive link? Correct. Inactive links mean the opposite of active links. Physically, an inactive link when clicked using a mouse will not generate a new page. In contrast to active links. Clicking will redirect to a specific page according to the URL embedded in it. Backlink effect The blog walker or admin term used to make comments on other blogs, usually aim to get backlinks. They then insert a link to his blog on the comments they wrote. In addition, he also hopes to get a response from people who visit the blog. Why was it removed Then why do active l

SCSS Animate Hover Scale Letters

Demo HTML Full Page <!DOCTYPE html><html><head> <link href="https://fonts.googleapis.com/css?family=Passion+One" rel="stylesheet" /> <style>html, body { height: 100%; } body { background: #e74c3c; display: -webkit-box; display: -ms-flexbox; display: flex; -webkit-box-pack: center; -ms-flex-pack: center; justify-content: center; -webkit-box-align: center; -ms-flex-align: center; align-items: center; font-family: 'Passion One', cursive; } .scale { font-size: 10vw; text-transform: uppercase; letter-spacing: 4px; color: #fff; cursor: pointer; } .scale span { display: inline-block; -webkit-transition: -webkit-transform 0.1s; transition: -webkit-transform 0.1s; transition: transform 0.1s; transition: transform 0.1s, -webkit-transform 0.1s; } .scale span:hover { -webkit-animation: rotate-scale-up 0.5s cubic-bezier(0.68, -0.55, 0.265, 1.55) both; anim

Hiding javascript to increase blogger blog speed

Image
Me often find comments on blogs Mascots inquiring about blogger widgets that can not be performed, such as the blog's stat widgets and more. Well that's because Maskolis add a code that hides JavaScript Widget widget Blogger so that all bloggers are using JavaScript automatically become unworkable. It turned out that this is done in order to speed up the loading of the blog. With the existence of this code, the browser can not recognize native JavaScript code Blogger.As we have seen, that the amount of JavaScript code in the blog, the more burdensome loading the blog. Perhaps some of you ask what the hell that Blogger Widget Javascript? If you look at the page source of your blog as CTRL + U, then you will see at the bottom of the HTML template you like the code below. <

How to create blogger sitemap per tables 100% Worked

Image
Stylish blogger sitemap per tables Tutorial Create Blogger Sitemap Per Tables: Open dashboard blogger. Navigate to pages tab Create New Page Enter the code below in html editor mode <div-wrapper id='wrapper'><div-wrapper dir="ltr" style="text-align:left;" trbidi="on"><div-wrapper class="table-of-content" id="table-of-content"><div-wrapper class="loading"><img class='loading' src='https://res.cloudinary.com/dimaslanjaka/image/fetch/http://www.amcsscentry.gov.in/asset/images/please_wait.gif'></div-wrapper></div-wrapper></div-wrapper><div-wrapper><script async='async' custom-element='div-wrapper' src='https://cdnjs.cloudflare.com/ajax/libs/modernizr/2.8.3/modernizr.min.js'></script> <link href='https://codepen.io/dimaslanjaka/pen/eWWzrL.css' rel='stylesheet'> <style type="text/css&q

How To Create a Blogger Contact Popup Comes With Google Maps

Image
The function of the contact form on a blog is to make it easier for blog visitors to contact the blog admin.   Blogger itself has provided a contact form that is already connected with the Gmail account admin blog.   Well this time I will share how to create a contact form Blogger popup with Google Maps equipped, so this (Google Maps) will be more to give visitors trust to the blog admin, especially if the blog is used for business or online store.   Visitors or consumers will be more confident because the business location is clear.   DEMO Please try on the menu " Contact " Interested to try it?   Please follow the steps below.   The first thing to do is to register your business location on Google My Business by storing our business location on Google Maps.   If you have not yet saved your business location on Google Maps, please follow the following tutorial:   How to Spot Your Places In Google Maps   And it will be better, verify also where your business is

Cara convert HTML ke Javascript document.write otomatis

Image
Bagaimana cara convert HTML ke Javascript document.write secara otomatis Biasanya orang yang membuat website atau blog yang menggunakan fitur javascript biasanya bingung dalam membuat LIKE BOX maupun SOCIAL SHARE BOX untuk website nya. Agar tombol like atau share dapat tepat merujuk like atau share terhadap artikel yang dikunjungi visitor. Nah berikut cara nya: 1. Masuk ke website berikut ini : HTML to Javascript Converter 2. Copy Kode HTML yang anda ingin terapkan dalam penerjemahan javascript. Kemudian paste Kode HTML tersebut ke dalam box yang sudah di sediakan. Kemudian klik Convert to javascript syntax . Selesai. HTML anda sudah siap untuk di terapkan di javascript untuk di print secara dinamis.

Javascript detect bot crawler

Image
function botCheck(){ var botPattern = "(googlebot\/|Googlebot-Mobile|Googlebot-Image|Google favicon|Mediapartners-Google|bingbot|slurp|java|wget|curl|Commons-HttpClient|Python-urllib|libwww|httpunit|nutch|phpcrawl|msnbot|jyxobot|FAST-WebCrawler|FAST Enterprise Crawler|biglotron|teoma|convera|seekbot|gigablast|exabot|ngbot|ia_archiver|GingerCrawler|webmon |httrack|webcrawler|grub.org|UsineNouvelleCrawler|antibot|netresearchserver|speedy|fluffy|bibnum.bnf|findlink|msrbot|panscient|yacybot|AISearchBot|IOI|ips-agent|tagoobot|MJ12bot|dotbot|woriobot|yanga|buzzbot|mlbot|yandexbot|purebot|Linguee Bot|Voyager|CyberPatrol|voilabot|baiduspider|citeseerxbot|spbot|twengabot|postrank|turnitinbot|scribdbot|page2rss|sitebot|linkdex|Adidxbot|blekkobot|ezooms|dotbot|Mail.RU_Bot|discobot|heritrix|findthatfile|europarchive.org|NerdByNature.Bot|sistrix crawler|ahrefsbot|Aboundex|domaincrawler|wbsearchbot|summify|ccbot|edisterbot|seznambot|ec2linkfinder|gslfbot|aihitbot|intelium_bot|facebookexternal

(FontAwesome) CSS3 Text Animation

Image
Text Animation CSS and FontAwesome Import font-awesome from cdn ->  https://cdnjs.cloudflare.com/ajax/libs/font-awesome/4.7.0/css/font-awesome.min.css CSS: @import url('https://fonts.googleapis.com/css?family=Anton|Roboto'); .word { font-family: 'Anton', sans-serif; perspective: 1000px; perspective-origin: 200px 40px; } .word span { cursor: pointer; display: inline-block; font-size: 100px; user-select: none; line-height: .8; } .word span:nth-child(1).active { animation: balance 1.5s ease-out; transform-origin: 0% 100% 0px; } @keyframes balance { 0%, 100% { transform: rotate(0deg); } 30%, 60% { transform: rotate(-45deg); } } .word span:nth-child(2).active { animation: shrinkjump 1s ease-in-out; transform-origin: bottom center; } @keyframes shrinkjump { 10%, 35% { transform: scale(2, .2) translate(0, 0); } 45%, 50% { transform: scale(1) translate(0, -150px); } 80% { transform: scale(1) translate(0, 0); } } .word span:n

(SCSS) Responsive Menu Hover Effect

Responsive Menu Hover Effect : Call jquery library -> <script src='https://ajax.googleapis.com/ajax/libs/jquery/3.2.1/jquery.min.js' async='async'></script> SCSS -> @import url("https://fonts.googleapis.com/css?family=Anton|Josefin+Sans"); ::-webkit-scrollbar { width: 10px; height: 10px; background-color: white; border-top: 1px solid #000; } ::-webkit-scrollbar-thumb { background-color: #1a1a1a; height: 5px; } * { box-sizing: border-box; } /*html, body { width: 100%; min-height: 100%; margin: 0; padding: 0; background: #000; } .page { width: 720px; float: left; position: relative; left: 50%; margin-left: -360px; padding: 10px; } .page h1, .page p { float: left; width: 100%; color: #fff; font-family: 'Josefin Sans', sans-serif; } .page h1 { text-transform: uppercase; margin-top: 115px; text-align: center; letter-spacing: 10px; } .page p { line-height: 20pt; font-size: 14pt

How to create sticky widget on sidebar blogger

Image
In the previous article I once shared a tutorial on Installing Sticky Functions On Blogger Widgets , this time I will share a tutorial with the same function that is to make a particular widget sticky or float following the page when scrolled down and up. This tutorial is an improvement as well as answering your comment from the previous tutorial which when the page is scrolled down sticky widget will pass the Footer Wrapper and it will be a bit annoying because it blocks the widgets that are installed in the Footer area. I will share this code more suitable to be installed on all content in Sidebar or can also be installed on one particular widget. For buddy who want to try it, please follow tutorial  How to Make Sticky Widget in Sidebar Blog . How to Create a Sticky Widget in Blog Sidebar 1. Login to Blogger --> Go to Template editor -->  Put below script before </body> tag <script type='text/javascript'> //<![CDATA[ $(function() { if ($(&#

Cara menambah query di html image source

Image
Cara menambahkan query di source image. Di World Wide Web , Query String adalah bagian dari uniform resource locator (URL) yang berisi data yang tidak sesuai dengan struktur jalur hierarkis. Query String umumnya mencakup bidang yang ditambahkan ke URL dasar oleh browser Web atau aplikasi klien lainnya, misalnya sebagai bagian dari bentuk HTML. Server web dapat menangani permintaan Hypertext Transfer Protocol baik dengan membaca file dari sistem file berdasarkan jalur URL atau dengan menangani permintaan menggunakan logika yang spesifik untuk jenis sumber daya. Dalam kasus di mana logika khusus dipanggil, string kueri akan tersedia untuk logika tersebut untuk digunakan dalam pemrosesannya, bersama dengan komponen jalur URL. Nah bersangkutan dengan artikel sebelumnya: Membuat semua link dan source html http menjadi https . Kali ini saya akan share bagaimana cara menambah Query String Atau Back Query di html source image. Berikut kode untuk menambah Query String di html image sou

Simple Recent Posts Blogger Plus Thumbnails

Image
Installing a recent post widget is one way to minimize bounce rate blog by providing information for the latest posts on readers. With so readers will easily find the most warm posts on the blog. Many kinds of recent post widgets like recent posts or recent carousel shaped posts. Well this time I will share a blogger widget recent posts are quite simple and stored in the sidebar blog. In addition to simple, recent posts widget has a fairly light loading, so you need to try also hehehe ... Demo If you are interested to try it, please follow the steps below. Please save the following CSS code above </head> code (you may need to customize some sections to customize it to the theme you are using). <style> /*<![CDATA[*/ ul#recent-posts{width:100%;margin:0 auto;padding:0!important;list-style-type:none} ul#recent-posts li{background:#FFF;padding:0!important;margin-bottom:10px;overflow:hidden;width:100%;height:auto;-webkit-box-shadow:2px 2px 3px rgba(0,0,0,.05);-o-